Before 5 July
Hastings Returns from the Front
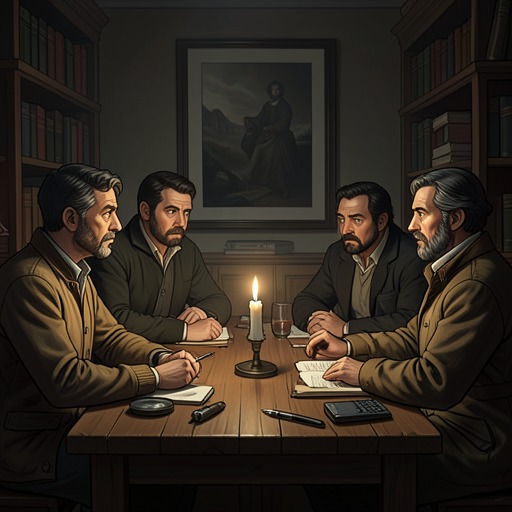
Wounded in the [First World War](entity:time-recall-time-first-world-war-440b2b40da3f), [Arthur Hastings](entity:character-recall-character-arthur-hastings-24d362cbed89) returns to England and spends several months recovering before receiving a month’s leave. With no close family to visit, he happens to meet [John Cavendish](entity:character-recall-character-john-cavendish-a337c6360b9a), an old acquaintance from [Styles Court](entity:location-recall-location-styles-court-66d1ef39b341), who invites him to stay at the family home in Essex.
Before 5 July
The Household’s Uneasy Marriage
On the way to Styles, John tells Hastings that his stepmother, [Emily Inglethorp](entity:character-recall-character-emily-inglethorp-fd1101107a47), has recently married [Alfred Inglethorp](entity:character-recall-character-alfred-inglethorp-79fc0ede57ed), a much younger man whom the household regards as an opportunist. John and his brother Lawrence are financially constrained by their late father’s arrangements, while Emily’s wealth and forceful personality give her considerable control over the family’s circumstances.
5 July
Hastings Meets the Household
At [Styles Court](entity:location-recall-location-styles-court-66d1ef39b341), Hastings meets [Evelyn Howard](entity:character-recall-character-evelyn-howard-e3d958a1907a), Emily’s blunt and capable companion, and [Mary Cavendish](entity:character-recall-character-mary-cavendish-ce53e31cc640), whose striking presence immediately captivates him. He also encounters Alfred, whose imposing beard and artificial manner deepen Hastings’s dislike, and learns about [Cynthia Murdoch](entity:character-recall-character-cynthia-murdoch-b7d1ce682df1), Emily’s dependent goddaughter who works at a hospital dispensary.
Early July, shortly after Hastings arrives
The Poirot Conversation
During tea, Hastings admits to Mary that he has long been fascinated by detective work and once met a celebrated Belgian detective who taught him to value method. Evelyn insists that people close to a real murder would recognize the culprit by instinct, while Mary recalls a doctor’s warning that obscure poisons may cause deaths no one suspects. Their talk foreshadows both the poisoning and the clash between instinct and proof.
Early July, the day after Hastings arrives
Evelyn Warns Emily
After a bitter dispute with Emily, Evelyn announces that she is leaving Styles. She accuses Alfred of pursuing Emily for her money and warns that he might murder her, pointing to his rumored attentions to [Mrs. Raikes](entity:character-recall-character-mrs-raikes-031fec86b456). Privately, Evelyn asks Hastings to watch over Emily and keep his eyes especially on her husband.
Early July
Mary’s Friendship with Bauerstein
As Evelyn departs, Mary warmly greets [Dr. Bauerstein](entity:character-recall-character-dr-bauerstein-76382fa2d411), a [London](entity:location-recall-location-london-420923d4a60a) specialist recovering from a nervous breakdown in the village. John identifies him as an expert on poisons and a close friend of Mary’s, a connection that unsettles Hastings and later fuels suspicion. John also admits that he is badly in need of money and resents the financial situation at Styles.
5–15 July
The Household’s Routines
Hastings settles into the rhythms of Styles: John works with volunteers and on local farms, Mary spends time with Bauerstein, and [Cynthia](entity:character-recall-character-cynthia-61eab8b1a7ff) serves at the [Tadminster](entity:location-recall-location-tadminster-b175cee23773) hospital dispensary. Emily continues her charitable projects and relies on her staff, while the family’s tensions simmer beneath a surface of ordinary country-house life.
Evening of 16 July
The Charity Entertainment
The household prepares for Emily’s charitable entertainment, where she recites a war poem to great applause and [Cynthia](entity:character-recall-character-cynthia-61eab8b1a7ff) takes part in tableaux. Cynthia stays overnight with friends after the performance, leaving Styles without her that night. The apparent social success of the evening conceals the carefully developing danger around Emily.
17 July, afternoon
The Dispensary Visit
After a luncheon party, Emily takes Hastings and Lawrence to [Tadminster](entity:location-recall-location-tadminster-b175cee23773), where they visit [Cynthia](entity:character-recall-character-cynthia-61eab8b1a7ff) at the hospital dispensary. Cynthia jokes about poisons but warns that accidental poisoning is alarmingly easy; she also shows them the dispensary’s locked poison cupboard. For a brief interval, Lawrence is apart from the others near the room, a moment whose significance will emerge much later.
17 July, late afternoon
Hastings Reunites with Poirot
At the village post office, Hastings unexpectedly runs into [Hercule Poirot](entity:character-recall-character-hercule-poirot-16ed38cee024), his old Belgian friend, who is living nearby with fellow refugees whom Emily has helped. Poirot is delighted by the reunion, and Hastings introduces him to [Cynthia](entity:character-recall-character-cynthia-61eab8b1a7ff). The meeting brings the detective into the story just as the household’s private troubles are nearing a crisis.
17 July, late afternoon
Emily Returns Disturbed
Back at Styles, Emily appears flushed and agitated after spending time in her boudoir. She calls for stamps and says she must finish letters before going to bed; [Dorcas](entity:character-recall-character-dorcas-551d5ed1ad82) urges her to rest. Lawrence leaves abruptly, while Mary hurries to confront Emily, signaling that an important dispute has begun inside the house.
17 July, late afternoon
Mary Demands the Paper
Hastings overhears Mary repeatedly demanding that Emily show her a paper. Emily insists it has nothing to do with the matter Mary suspects, and Mary bitterly accuses her of shielding someone. [Cynthia](entity:character-recall-character-cynthia-61eab8b1a7ff) later tells Hastings that [Dorcas](entity:character-recall-character-dorcas-551d5ed1ad82) heard a serious quarrel between Emily and Alfred, but the overlapping suspicions leave the true participants and motive unclear.
17 July, about 4 p.m., as later reconstructed
The Secret of the Quarrel
[Dorcas](entity:character-recall-character-dorcas-551d5ed1ad82) later recounts that she heard Emily angrily accuse a man of lying, deception, and bringing disgrace on the family, then declare that fear of scandal would not deter her from doing her duty. She had assumed the other voice belonged to Alfred, but Poirot eventually establishes that Emily was confronting John about his conduct and threatening to expose him to Mary. Mary overheard much of the exchange from outside the open boudoir window.
17 July, about 4:30 p.m.
A New Will Is Signed
After a discussion about wills and marriage, Emily summons gardener [William Earl](entity:character-recall-character-william-earl-d1da31595ee5) to obtain a will form. She has him and [Manning](entity:character-recall-character-manning-8efba1244d9e) witness a document she signs, covering its contents with blotting paper. She places it in a long envelope and puts it in the purple despatch-case; this new will, made on the day she dies, will become a central mystery.
17 July, about 5 p.m.
Emily Finds the Letter
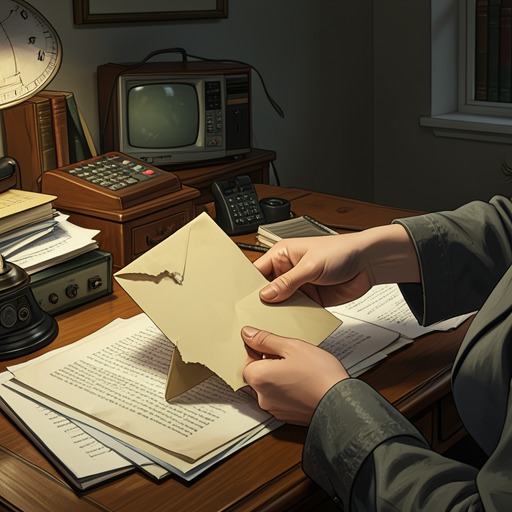
Emily asks [Dorcas](entity:character-recall-character-dorcas-551d5ed1ad82) for tea and confides that she has received a great shock. Holding a written paper, she says that a few words have changed everything and speaks of the misery of scandal between husband and wife. She orders a fire in her bedroom, apparently intending to destroy a document, then later writes several letters, including one to her solicitor.
17 July, after supper
The Evening Coffee
At supper, Emily remains upset and soon retires to her boudoir to finish her letters. Mary pours coffee for the others, but Alfred takes Emily’s cup himself, saying he will carry it to her. Later he claims that he set it down in the hall after being called away, and that someone else must have taken it on to Emily.
17 July, late evening
Bauerstein Arrives Muddy
[Dr. Bauerstein](entity:character-recall-character-dr-bauerstein-76382fa2d411) arrives at Styles plastered with mud after falling into a pond while searching for a rare fern. Alfred insists that he come inside, and the doctor stays for coffee despite his disheveled appearance. The visit later proves important to the timing and interpretation of the missing coffee cup.
17 July, shortly before midnight
Emily Goes Upstairs
After the gathering, Emily asks [Cynthia](entity:character-recall-character-cynthia-61eab8b1a7ff) to carry up her dispatch case as she goes to bed. Three people see Emily holding her coffee, still untasted. Alfred says he will walk to the village to see the estate agent and take the latch-key, while the rest of the household settles for the night.
16–17 July, reconstructed later
The Poisoning Plan Misfires
The scheme later revealed by Poirot was intended to kill Emily on the evening of [16 July](entity:time-recall-time-16-july-2b970a8fdcfb), when [Cynthia](entity:character-recall-character-cynthia-61eab8b1a7ff) was away and Emily would have been isolated. Alfred and Evelyn had arranged for Emily’s bell wire to be cut and had prepared a poison plot involving her strychnine tonic and bromide powders. Emily forgot to take the fatal dose that night, and the plan’s timing slipped by a day.
Night of 17–18 July
Emily’s Fatal Dose
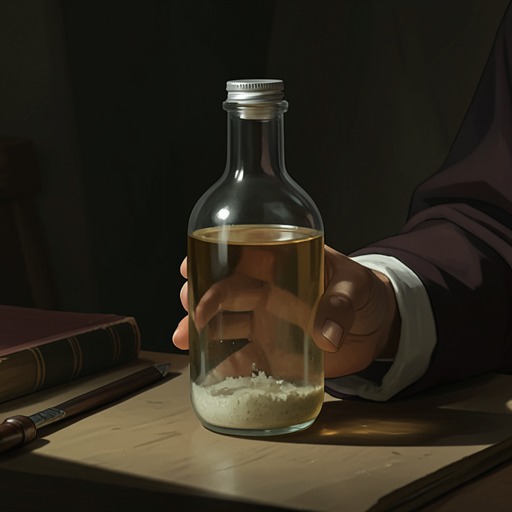
Emily takes the final, heavily concentrated dose of her tonic after bromide has caused its strychnine to precipitate at the bottom of the bottle. Earlier, Mary has secretly given Emily and [Cynthia](entity:character-recall-character-cynthia-61eab8b1a7ff) a narcotic, intending to enter Emily’s room and retrieve the paper that she believes concerns John’s infidelity. The narcotic delays the poison’s effects and leaves Cynthia asleep through the night’s disturbance.
Night of 17–18 July
The Bell Fails
Because Emily’s bell wire has been cut, her attempts to summon help cannot bring the servants promptly. She suffers a violent attack alone in her room before the household hears her cries and the noise of the overturned bedside table. The broken bell, originally part of a plan to prevent assistance, becomes one of the clues to the intended timing of the murder.
Before dawn, 18 July
Mary Enters Emily’s Room
Mary reaches Emily’s room through the connecting door from [Cynthia](entity:character-recall-character-cynthia-61eab8b1a7ff)’s room, searching for the incriminating paper. When Emily’s attack begins, Mary drops a candle, leaving grease on the floor, retreats through Cynthia’s room, and begins waking the girl before the others arrive. She later falsely implies that she heard the table fall from her own room, concealing her presence but not participating in the poisoning.
About 4:30 a.m., 18 July
The Household Breaks In
Lawrence wakes Hastings to report that Emily is having a fit and has locked herself in. John, Lawrence, Hastings, and the servants try the doors, finding the passage door and the connecting doors apparently secured; they finally force entry. Emily lies in convulsions, and Lawrence freezes at a sight or detail near the mantelpiece that Hastings cannot identify.
Near 5 a.m., 18 July
Emily Dies in Convulsions
Emily briefly regains enough strength to call the episode sudden, but another terrible convulsion overtakes her. Bauerstein arrives and attempts artificial respiration; Emily gasps “Alfred” before falling still. [Dr. Wilkins](entity:character-recall-character-dr-wilkins-5d562bf90369) and Bauerstein agree that the circumstances require a post-mortem, turning the household’s private tragedy into a formal investigation.
Morning of 18 July
Hastings Suspects Poison
Hastings tells Mary that he believes Emily was poisoned, and Mary reacts with a sudden cry before retreating in distress. When the family gathers, Alfred is absent, and Emily’s dying word seems to point accusingly toward him. John agrees to let Hastings ask Poirot to investigate discreetly before the post-mortem.
Morning of 18 July
Hastings Recruits Poirot
Hastings finds Alfred returning from the village and hears his explanation that he had stayed overnight with the estate agent after forgetting his latch-key. The convenient absence intensifies Hastings’s suspicion. He then seeks Poirot at [Leastways Cottage](entity:location-recall-location-leastways-cottage-d6f94cf07fa6), gives a full account of events, and asks him to investigate Emily’s death.
18 July, morning
Poirot Inspects the Bedroom
Poirot examines Emily’s locked bedroom and notes the smashed coffee cup, a damp coffee stain, a fragment of green fabric, candle grease, and the disturbed doors. He retrieves a tiny particle from a bolt, samples the remaining cocoa, and finds a charred fragment of a will in the grate. He insists that no detail can be dismissed merely because it seems small.
18 July, morning
Dorcas Recounts the Afternoon
In Poirot’s interview, [Dorcas](entity:character-recall-character-dorcas-551d5ed1ad82) describes the afternoon quarrel, Emily’s later shock, and the paper she held while speaking of changed circumstances. She confirms that Emily’s purple case normally held important documents and that its key had gone missing. Dorcas also says Emily had finished her sleeping powders, and that cocoa was habitually prepared and left near the servants’ swing door.
18 July, late morning
Annie Reports Salt on the Tray
[Annie](entity:character-recall-character-annie-a433aee3d6b7) explains that cocoa was prepared early and left on a table in the left wing before being taken to Emily’s room. On the fatal night, she noticed coarse white material on the tray but brushed it away, assuming it was kitchen salt. Poirot refuses to accept Hastings’s confident conclusion that this must have been strychnine.
18 July, late morning
The Coffee Cups Are Tested
Poirot examines the coffee cups from the drawing room and finds that all the cups present can be accounted for among the household members who drank coffee. [Cynthia](entity:character-recall-character-cynthia-61eab8b1a7ff) says that she never takes sugar in coffee, and Poirot becomes visibly troubled when he realizes that every recovered cup contains sugar. The missing cup has not yet been identified, and the coffee remains a central puzzle.
18 July, late morning
The Inheritance Is Unclear
Lawyer [Mr. Wells](entity:character-recall-character-mr-wells-aa94d41e014b) explains that Emily’s latest known will, made before her marriage, left her fortune to John, while Lawrence was separately provided for by their father’s will. Because Emily remarried, that earlier will had been automatically revoked. Poirot asks whether she might have made a new will in favor of Evelyn, drawing attention to the possibility that the burned document changed the inheritance.
18 July, around noon
The New Will Is Confirmed
Poirot calls gardener [Manning](entity:character-recall-character-manning-8efba1244d9e), who confirms that Emily summoned him and [William Earl](entity:character-recall-character-william-earl-d1da31595ee5) to witness a newly signed will on the previous afternoon. The document was placed in her purple case, and its timing matches the disputed hours of the quarrel. The discovery raises the possibility that Emily’s death and the disappearance of the will are connected.
18 July, shortly after noon
The Despatch-Case Is Forced
When Poirot returns to Emily’s bedroom, the purple despatch-case he had locked is open, its lock forced, and a document missing. He concludes that someone has risked entering the room to remove evidence, and blames himself for not carrying the case away. The intrusion proves that the murderer is still actively trying to erase the trail.
18 July
The Inquest Is Arranged
[Dr. Wilkins](entity:character-recall-character-dr-wilkins-5d562bf90369) and Bauerstein insist that Emily’s death cannot be certified as natural, so a post-mortem and inquest are unavoidable. Poirot warns John that Alfred’s absence and the disturbed bedroom need careful interpretation rather than immediate accusation. He begins gathering testimony while the household struggles to contain publicity and suspicion.
Friday, after 18 July
The Inquest Finds Strychnine
At the inquest in the village, Bauerstein testifies that Emily died from a large dose of strychnine. He cannot establish how it was administered and says that the cocoa contains no strychnine, while the coffee cup is too badly smashed to test. The delayed onset of symptoms remains unexplained, and the jury hears that the poison could not plausibly have come from Emily’s tonic by accidental cumulative use.
Friday, during the inquest
Lawrence Suggests the Tonic
Lawrence proposes that Emily might have died from the strychnine in her prescribed tonic, either through accumulation or an accidental overdose. [Dr. Wilkins](entity:character-recall-character-dr-wilkins-5d562bf90369) dismisses the suggestion as medically impossible, and [Dorcas](entity:character-recall-character-dorcas-551d5ed1ad82) confirms that Emily took the final dose on the day of her death. Poirot finds Lawrence’s insistence suspicious because Lawrence had trained as a doctor and should understand why his theory fails.
Friday, during the inquest
Mary Withholds the Quarrel
Mary admits that she had been sitting outside the boudoir while Emily and another person argued, but claims she heard almost nothing. She recalls only a reference to scandal between husband and wife, despite remaining nearby with the window open. Her carefully limited testimony convinces Poirot that she knows more than she says and that the quarrel was not the one everyone assumes.
Friday, during the inquest
Mace Accuses Alfred
Chemist’s assistant [Albert Mace](entity:character-recall-character-albert-mace-7ee2b3e9467c) testifies that he sold strychnine to a man he identifies as Alfred on the evening of [16 July](entity:time-recall-time-16-july-2b970a8fdcfb). Alfred denies the purchase and produces a handwriting sample that does not match the register. He also denies quarreling with Emily, while the jury returns a verdict of wilful murder against an unknown person or persons.
After the inquest
Poirot Blocks Alfred’s Arrest
Outside the inquest, [Scotland Yard](entity:organization-recall-organization-scotland-yard-598725f8a130) detectives [James Japp](entity:character-recall-character-james-japp-117897c4be79) and Summerhaye regard Alfred as an obvious suspect, but Poirot urges them not to arrest him. He argues that the evidence against Alfred is too neatly manufactured and that the chemist may have seen a disguised impersonator. Poirot promises to demonstrate why the case cannot stand and draws on his old professional relationship with Japp.
After the inquest, later that day
Poirot Reveals Alfred’s Alibi
Before the family and detectives, Poirot reveals that Alfred was escorting [Mrs. Raikes](entity:character-recall-character-mrs-raikes-031fec86b456) near [Abbey Farm](entity:location-recall-location-abbey-farm-948a8260c8e5) at the time Mace says the poison was bought. Five witnesses can place him there, too far from the village to have entered the chemist’s shop. Alfred’s alibi clears him of the apparent purchase, but leaves open why he concealed his whereabouts and what he was hiding.
After Alfred’s alibi
A Disguise Is Suspected
Poirot explains that someone could easily impersonate Alfred because his beard, glasses, and distinctive clothes make his appearance recognizable at a glance. Alfred’s silence, far from proving guilt, may conceal some separate disgrace, and his apparent eagerness to be arrested looks increasingly calculated. Poirot also questions why the medically trained Lawrence supports a theory he should know is untenable.
After the inquest
Evelyn Returns to Styles
Evelyn arrives at Styles after hearing of Emily’s death and openly condemns Alfred, refusing to consider another culprit. Poirot asks her to help him, then presses her about whether her instinct truly identifies Alfred as the murderer. Her emotional response reveals that she fears another person may be guilty, although she cannot bring herself to name that person.
After Poirot questions her
Evelyn Chooses Justice
Evelyn admits that she has been trying to suppress an instinctive suspicion of someone else. She briefly suggests that the truth might be hushed up, but Poirot insists that justice must not be avoided. Evelyn regains her resolve and agrees to watch carefully, becoming an ally even though she does not disclose what she knows.
After the inquest, soon after Evelyn’s return
Hastings Delivers the Coffee Message
Poirot asks Hastings to tell Lawrence, “Find the extra coffee-cup, and you can rest in peace.” Lawrence appears baffled, and Hastings cannot explain the cryptic instruction. Poirot is pleased by Lawrence’s genuine confusion, while privately treating the missing cup as a way to test whether Lawrence knows what happened to it.
After the inquest
Poirot Rechecks the Cocoa
Although Bauerstein has already reported that the remaining cocoa contains no strychnine, Poirot sends his own sample to an analytical chemist for a broader examination. Hastings cannot understand why he repeats a test already performed. Poirot’s decision reflects his suspicion that the first analysis answered only a narrow question and may have missed another substance.
A few days after the funeral
Alfred Leaves the House
After Emily’s funeral, Alfred moves to the village inn, relieving the household of the strain of living beside a man they had accused and then been forced to regard as innocent. John admits that the family feels guilty about its treatment of him but still dislikes him. Meanwhile, reporters besiege Styles and [Scotland Yard](entity:organization-recall-organization-scotland-yard-598725f8a130) continues searching the house.
After the funeral
The Attic Dressing Box
[Dorcas](entity:character-recall-character-dorcas-551d5ed1ad82) remembers that the household’s old dressing-up box may contain a green garment, a detail that could account for the fragment found in Emily’s bedroom. Poirot searches the attic and finds a newly made black beard among the costumes. He recognizes that it has been trimmed to resemble Alfred’s beard, strengthening the theory that someone used a disguise.
After the beard is found
Evelyn Becomes Poirot’s Ally
Poirot persuades Evelyn to help him despite her hostility toward Alfred. He reasons that her fierce denunciations may be an effort to drown out a deeper instinct, and that she is watching someone she cannot yet expose. Evelyn agrees that she will stand with justice, though she remains distressed by the possibility that the truth may destroy someone she cares about.
After the funeral
Mary Confesses Her Unhappiness
Mary tells Hastings that she and John are unhappy and that she plans to leave Styles. She explains that she married him as an escape from a constricted life, not out of love, and that they drifted apart. Her attraction to freedom and her charged dealings with Bauerstein have concealed a marriage still shaped by pride and jealousy.
After the funeral, during the investigation
Bauerstein Is Arrested
Hastings learns that Bauerstein has been arrested and assumes that Poirot has identified him as Emily’s murderer. Poirot returns from [London](entity:location-recall-location-london-420923d4a60a) and explains that the doctor has actually been arrested for espionage, not poisoning. His German birth and nighttime movements had attracted suspicion, while his relationship with Mary helped conceal his other activities.
After Bauerstein’s arrest
The Costumer’s Wrapper
Evelyn slips Poirot a dusty piece of brown paper bearing the label of a theatrical costumer and an address to a Cavendish with an uncertain initial. Poirot identifies the initial as an L and says the wrapper confirms one of his suspicions. It points toward a parcel of disguise equipment and helps redirect attention from John to Lawrence.
After the wrapper is found
The Broken Bell Wire
Poirot asks [Dorcas](entity:character-recall-character-dorcas-551d5ed1ad82) whether Emily’s bell malfunctioned before the tragedy. Dorcas remembers that its wire had been chewed through and repaired on Tuesday morning. The detail confirms that the bell was deliberately disabled in advance, making the planned isolation of Emily part of a larger scheme rather than an accidental household mishap.
After Poirot visits the dispensary
Bromide Fingerprints
Poirot shows Hastings magnified photographs of fingerprints from a tiny bottle in the hospital poison cupboard. One set matches Lawrence’s prints, left during the brief interval when he was alone in the dispensary. The bottle contained strychnine hydrochloride, a discovery that seems to implicate Lawrence but also adds another suspicious strand to an already crowded case.
Near the end of the investigation, before John’s arrest
Lawrence Finds the Cup
Lawrence tells Hastings that he believes he has found the extra coffee cup Poirot mentioned. This confirms that a cup was removed from the ordinary set after the evening coffee, although Lawrence had earlier seemed to know nothing about the clue. Poirot’s puzzle now links the dispensary visit, [Cynthia](entity:character-recall-character-cynthia-61eab8b1a7ff)’s sleep, and the unexplained disappearance of one cup.
Near the end, as Poirot’s investigation converges
The Poisoned Tonic Mechanism
Poirot concludes that bromide powder added to Emily’s tonic caused the strychnine to precipitate into crystals, leaving the last dose dangerously concentrated. Emily’s failure to take her medicine on the intended night delayed the murder by a day and disrupted the conspirators’ plan. The final dose, not the cocoa or coffee, delivered the fatal quantity of poison.
After Poirot’s dispensary investigation
John Is Arrested
When Hastings and Poirot return to Styles, [Dorcas](entity:character-recall-character-dorcas-551d5ed1ad82) reports that the detectives have arrested John, not Lawrence. Mary collapses at the news, while Poirot’s expression shows that the arrest is part of a larger design. The prosecution will argue that John used the disguise and poison evidence to murder Emily, and Mary will fight fiercely to save him.
15 September, two months after the arrest
John’s Murder Trial
John is tried at the [Old Bailey](entity:location-recall-location-old-bailey-1fe06b0bf1ce) for Emily’s murder and pleads not guilty. The prosecution presents his financial trouble, the quarrel, the apparent purchase of strychnine in Alfred’s name, the destroyed will, and the forged-looking disguise evidence as a coherent case. Mary stands by her husband, while Poirot remains officially in the background, still lacking the proof needed to expose the real killers.
During John’s trial
The Case Against Lawrence
The prosecution’s evidence also implicates Lawrence: a beard had been ordered for L. Cavendish, his fingerprints were found on the strychnine bottle, and he could inherit Styles if John were convicted. Lawrence admits handling the bottle, explaining that his former medical studies made poisons interesting to him. The overlapping accusations threaten to confuse the jury about which brother is guilty.
During John’s trial
John’s Defense and Alibi
John testifies that an anonymous blackmailing note took him to Marston’s Spinney at the time the strychnine was allegedly purchased. He denies writing the note or impersonating Alfred and insists that Lawrence is innocent. The defense argues that evidence found in an unlocked drawer could have been planted and that John knew the earlier will had already been revoked by Emily’s remarriage.
During the trial, after Hastings recalls the mantelpiece
Poirot Finds the Missing Letter
As Hastings remembers that Poirot’s hand once shook while he straightened objects on Emily’s mantelpiece, Poirot realizes that someone had moved the spill vases. He rushes back to Styles and finds strips of a letter hidden among the spills. The recovered writing is the last link he has been seeking: direct evidence that Alfred and Evelyn planned Emily’s death.
After Poirot returns to Styles with the letter
Poirot Reveals Mary’s Entry
Poirot gathers the household and explains that Mary entered Emily’s room through [Cynthia](entity:character-recall-character-cynthia-61eab8b1a7ff)’s room, leaving a torn piece of her green land armlet caught in the connecting-door bolt. She had been trying to retrieve the paper she believed concerned John’s infidelity and concealed her movements when Emily’s attack began. Mary admits the account is true, but says she hid it because it did not seem to affect John’s guilt.
During Poirot’s final explanation
Mary’s Drugged-Cocoa Plot
Poirot explains that Mary had drugged both Emily and [Cynthia](entity:character-recall-character-cynthia-61eab8b1a7ff) so she could search Emily’s room without waking Cynthia. The narcotic delayed Emily’s strychnine symptoms, making the timing of the death appear inexplicable. Mary had also removed Cynthia’s coffee cup, fearing it might connect the girl to the death; her actions were driven by jealousy and fear, not by an attempt to murder Emily.
During Poirot’s final explanation
The Fatal Tonic Is Explained
Poirot clarifies that Emily never drank the coffee: the unstable table tipped it to the floor, breaking the cup, and she then drank her cocoa. The strychnine came from her tonic, where bromide had concentrated the poison in the final dose. The murderers expected her to take that dose on [16 July](entity:time-recall-time-16-july-2b970a8fdcfb), but her delay shifted the death to the following night.
During Poirot’s final explanation
The Murder Letter Is Read
Poirot reads the recovered letter, in which Alfred tells Evelyn that the killing will happen that night rather than the previous one and credits her bromide idea. Alfred recognizes the handwriting and lunges at Poirot, but Poirot knocks him down and identifies him as the murderer. The conspiracy is exposed, and Alfred and Evelyn are taken into custody.
After the arrests
The Conspiracy Is Reconstructed
Poirot explains that Alfred and Evelyn were cousins, lovers, and co-conspirators who planned to inherit Emily’s fortune and escape together. Evelyn’s apparent hatred of Alfred was a performance; she impersonated him at the chemist’s, signed the poison register in a way meant to implicate John, and planted incriminating objects in his room. Alfred encouraged suspicion to engineer an acquittal that would protect him from another trial.
After the conspiracy is exposed
Lawrence and Cynthia Are Reconciled
Poirot reveals that Lawrence’s strange defense of natural death sprang from his love for [Cynthia](entity:character-recall-character-cynthia-61eab8b1a7ff). He crushed the coffee cup because he feared it might implicate her, and he misrepresented the connecting door’s bolt to shield her. Cynthia had mistaken his reserve for dislike, but the danger and Poirot’s revelations bring the two together.
After the arrests
John and Mary Reunite
John and Mary are reunited after the ordeal of his arrest and trial brings their buried attachment into the open. Poirot admits that he could have cleared John sooner but delayed while searching for evidence against the real conspirators, believing the crisis might also restore the marriage. Mary’s loyalty and John’s return end the estrangement that had shaped their lives at Styles.
Near the ending
Hastings and Poirot Part as Friends
With the mystery solved and the household’s relationships newly settled, Hastings reflects on the women he has admired and the romances that have passed him by. Poirot teases him about his lack of success and suggests they may hunt together again. Their affectionate partnership closes the story, with [Poirot’s method](entity:concept-recall-concept-poirot-s-method-e056d4b96cd2) and Hastings’s loyalty once more intertwined.